Modding Guide
The $2 Premium Keyboard Hack: Ultimate DIY Tuning for Budget Gears
You don't need a $150 custom mechanical keyboard to get that satisfying, premium 'thocky' or 'poppy' sound. Learn how to transform a hollow, rattling $20 keyboard using basic painter's tape and leftover packaging foam — the whole process takes about 20 minutes.
- 5 min read
The Hollow Echo of Budget Keyboards
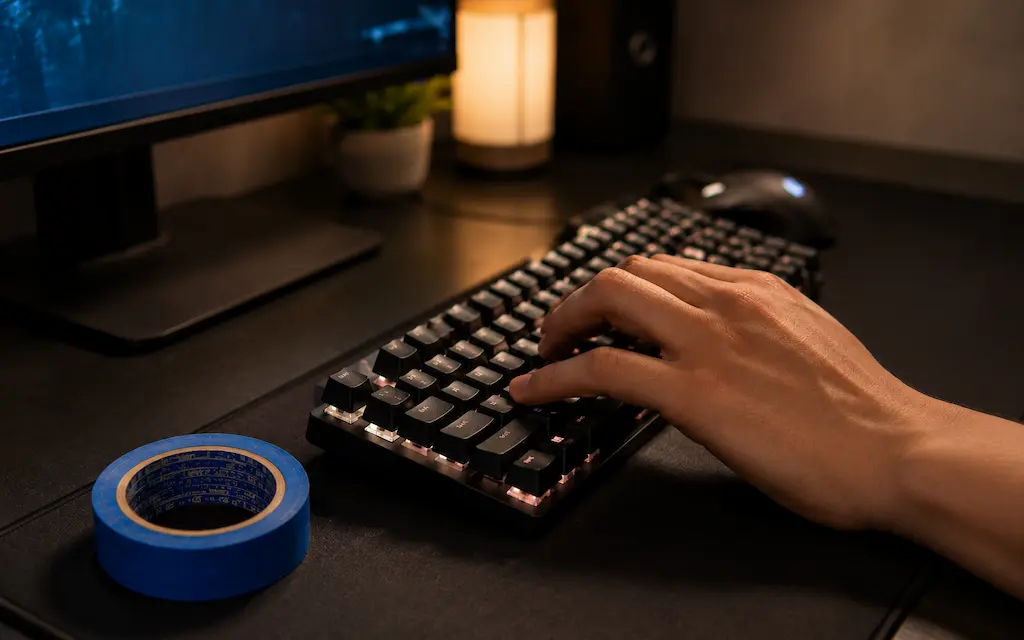
Most ultra-budget mechanical and membrane keyboards suffer from a fatal acoustic flaw: emptiness. Manufacturers use thin plastic cases with zero internal dampening, leaving massive air pockets beneath the PCB. When you hit a key during a clutch round in CS2 or Valorant, that mechanical vibration echoes inside the hollow chassis, producing a harsh, metallic 'ping' and annoying stabilizer rattle. Note: this guide is designed for tray-mount and direct-mount budget boards — the most common construction in the $15–$30 range. If your keyboard uses a gasket or top-mount design, the tape mod will have minimal acoustic effect. You can fix this entire issue in less than 20 minutes using the legendary Tempest Tape Mod and a bit of zero-dollar packaging foam.
The $2 Modding Kit: Choosing Your Tape & Foam
If you want to learn how to tape mod a budget keyboard: premium sound for $2 is completely achievable, but your choice of materials matters. The wrong adhesive can permanently damage your PCB or create a fire hazard. You need non-conductive, low-residue tape and dense, thin foam that fits inside tight plastic enclosures without straining internal clips to get that premium poppy sound on a budget. For mechanical keyboards, both the tape and foam make a noticeable difference. For membrane keyboards, skip the tape on the membrane sheet and focus on case foam instead — the tape layer can interfere with the membrane's contact registration.
Blue Painter's / Masking Tape (~$2)
The Holy Grail
Standard paper-based painter's tape is completely non-conductive and features a low-tack adhesive. It cleanly absorbs high-frequency pings while remaining completely safe for electronics. It can be easily peeled off later without tearing components off the circuit board.
Recommended Gear:
- 3M ScotchBlue Painter's Tape
- Generic Paper Masking Tape
Leftover Packaging Foam (PE / EVA Foam)
Zero-Dollar Solution
The thin, squishy foam sheet that wrapped your motherboard, GPU, or even the keyboard itself inside its retail box. Placing a 1-2mm layer at the bottom of the case acts as a powerful acoustic absorber that swallows the remaining low-end case echo.
Recommended Gear:
- 1mm/2mm Packaging Foam Sheets
- Generic Craft Foam Sheets
* As an Amazon Associate I earn from qualifying purchases.
Step-by-Step Guide: Tuning Your Keyboard's Acoustics
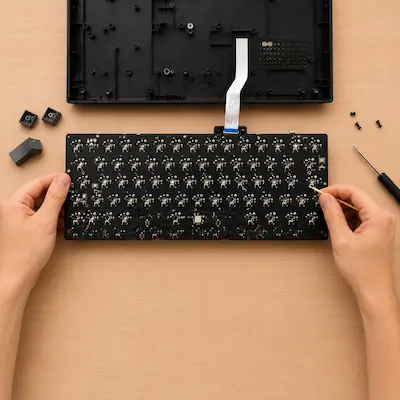
1Open the Case and Expose the PCB
Unplug your keyboard. To begin this budget keyboard modding process, remove keycaps around the case screws — check under rubber feet and warranty stickers if the screws aren't visible. Gently pry apart the top and bottom housing, watching for a thin internal USB ribbon cable that connects the PCB to the port on budget boards. Once open, flip the PCB over to start your mechanical keyboard sound upgrade. You'll see rows of soldered switch pins and empty space between them — that exposed surface is exactly where the tape goes. Use a toothpick or precision knife to note where the case screws and ribbon cable need to pass through so you can clear those spots after taping.
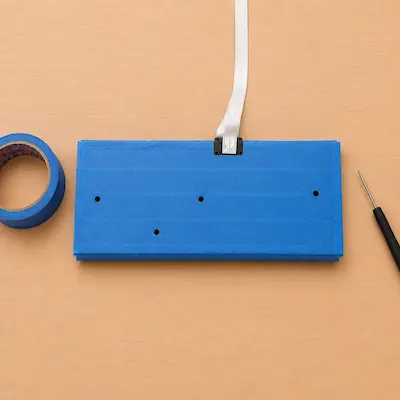
2Apply the Tape Layers
This is the core of the tempest tape mod guide. If you have a membrane keyboard, skip this step entirely and go straight to Step 3 — tape on the membrane sheet can interfere with key registration. For mechanical boards, your goal is to make cheap mechanical keyboard sound premium: selecting the best masking tape for keyboard mod steps is essential. Lay your first strip of painter's tape directly onto the back of the PCB, covering the switch pins completely. Smooth it flat with your fingers. Apply a second strip crosswise over the first — the perpendicular orientation means each layer dampens vibrations along a different axis, giving you broader frequency coverage than two parallel strips would. Then poke clean holes through both layers at the screw points and ribbon cable passthrough using a toothpick or small screwdriver. For ultra-budget boards, 2 layers is the sweet spot. A third adds a touch more depth, but avoid going beyond 3 layers — the added thickness can make the assembly too thick to close the case on tight injection-molded budget housings.
NEVER use duct tape, electrical tape, or any metallic packing tape. Paper painter's tape or masking tape only — anything else risks trapping heat or leaving conductive residue on the circuit board.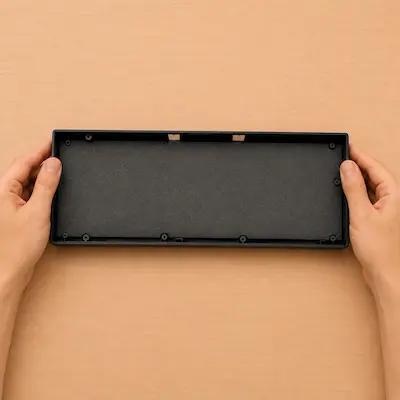
3Add Case Foam and Reassemble
For an effective cheap keyboard foam mod, cut your packaging or craft foam to match the shape of the bottom plastic shell and lay it inside. This diy keyboard sound dampening layer is crucial to fix rattling spacebar budget keyboard issues rooted in case echoes. Re-seat the taped PCB on top, reconnect the ribbon cable, and carefully snap the housing back together. If the case bulges or won't close flush, the foam is too thick — trim it down rather than forcing it, as overtightening can crack the plastic standoffs inside budget cases. Screw everything back in, flip the board over, and test every key before putting the keycaps back on.
What You Actually Get After the Mod
Deeper, Cleaner Sound Profile
The tape layers act as a low-pass filter, forcing high-frequency 'clacks' and 'pings' to transform into a deeper, cleaner 'thocky' pop. Most people are surprised how dramatically a $20 keyboard changes after two layers — it stops sounding like a toy and starts sounding like something that cost three times as much.
Crisper, More Planted Tactile Feedback
By eliminating hollow air pockets and loose case vibrations, every keystroke feels more solid and immediate. When you're counter-strafing or cycling through weapons, the feedback is sharper — no more muddy resonance blurring the physical response of each press.
Knowing When to Stop
This ultra budget keyboard tuning mod has real limits worth understanding. It's designed for tray-mount and direct-mount boards — if your keyboard has a gasket or top-mount design, the tape will make minimal acoustic difference, as those boards already isolate the PCB from the case. Similarly, if your stabilizers are the main source of rattle, no amount of tape solves that; you need to lube the stabs separately. The tape mod targets PCB resonance, not every source of noise.
Frequently Asked Questions
Yes, opening the keyboard chassis almost always voids the manufacturer's warranty, as you usually have to break a warranty sticker to access the internal case screws. On an ultra-budget $15–$25 keyboard, that trade-off is almost always worth it — but it's worth knowing upfront.
Yes, it is completely safe as long as you use standard paper painter's tape or masking tape. These materials are non-conductive and do not hold static charge. Avoid using plastic-based packing tapes, gorilla tape, or heavy electrical tape, as they can trap heat or leave behind a nasty conductive adhesive residue.
Partially. Skip putting tape directly on the membrane sheet — it can interfere with key registration. Instead, focus purely on case foam at the bottom of the chassis. That alone can dramatically reduce the hollow plastic rattle of budget membrane frames and make them feel noticeably more solid.
For 95% of budget keyboards, 2 layers provide the perfect balance. Adding a third layer deepens the sound slightly and makes it a touch quieter. Avoid going beyond 3 layers — the added thickness can make the internal assembly too thick to fit back inside tight injection-molded budget cases.
You May Also Like
- Mouse Grip Tape: Are Cheap Anti-Slip Stickers Worth It for CS2 & Valorant?
- Mouse Cable Management: Get Wireless Freedom on a Budget for CS2 & Valorant
- Mouse Tuning: Replacing Mouse Skates for Better Performance in CS2 & Valorant
- Best Ultra‑Budget Gaming Mice under $20 for CS2 & Valorant
- Best Ultra-Budget Gaming Keyboards Under $20 for CS2 & Valorant