Hardware Guide
How to Install an NVMe SSD: Step-by-Step Guide for Beginners
Adding an NVMe SSD is the highest-impact single hardware upgrade for your PC in 2026: this step-by-step guide for beginners shows you how to install an M.2 drive, covers thermal pad fitting, BIOS detection and configuration, and Windows setup in under 15 minutes. Eliminate storage bottlenecks and cut game load times by up to 80% — from unboxing to first boot.
- 11 min read
Before You Start: What You Need
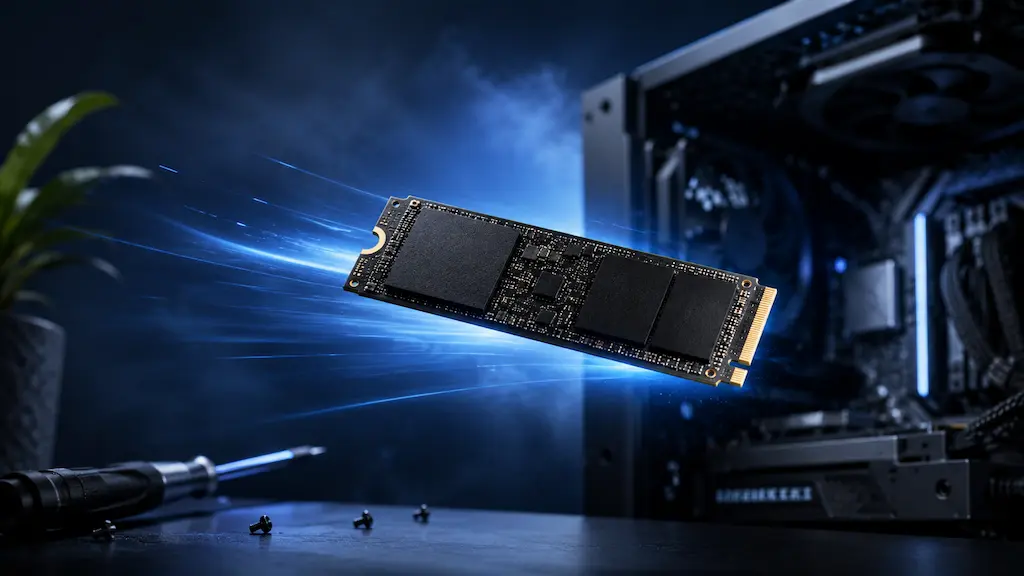
Installing an NVMe SSD requires minimal tools and no special electrical knowledge. This nvme ssd install beginner guide 2026 provides a complete step-by-step walkthrough to help you install your drive with zero hassle. Unlike older SATA drives, NVMe SSDs do not use data or power cables — they connect directly to the motherboard via the M.2 slot and draw power through the slot itself. The full installation process typically takes 10–15 minutes.
Before opening your PC, gather: a single Phillips head screwdriver (PH1 or PH2 size), your NVMe SSD, and optionally a thermal pad if your SSD or motherboard does not include one. You do not need thermal paste — NVMe drives use thermal pads, not paste. Ground yourself by touching the metal PC case chassis before handling any components to discharge static electricity.
1Verify Your Motherboard Has an Available M.2 Slot
Check your motherboard manual or manufacturer specifications for available M.2 slots.
Key specifications to check:
• Key Type: M-key (single notch) is used by PCIe/NVMe drives; B+M-key (two notches) is used by older SATA M.2 drives.
• Supported Length: 2280 (80mm) is standard for most consumer NVMe SSDs.
• PCIe Generation: PCIe 4.0/5.0 slots are backward compatible with PCIe 3.0 drives.
Confirm your SSD form factor and key type match an available slot.
2Check If Your SSD Needs a Thermal Pad
NVMe SSDs (especially PCIe 4.0/5.0) commonly run at 50–70°C under sustained load, with throttling risk increasing above roughly 80°C — the exact point depends on the controller.
Cooling recommendations:
• Use motherboard built-in M.2 heatsinks with pre-applied thermal pads when available.
• For secondary un-heatsinked slots: purchase a 1mm thick thermal pad (Thermal Grizzly Minus Pad 8 or equivalent).
• Adequate thermal management prevents speed throttling under heavy workloads.
3Back Up Critical Data Before Installation
If installing as a secondary data drive, no backup is strictly required.
If replacing your primary boot drive:
• Back up documents, game saves, and irreplaceable files to external/cloud storage.
• Prepare your OS cloning or fresh installation tool before opening the case.
M.2 Cooling Essentials: Recommended Heatsinks & Thermal Pads
Modern PCIe 4.0 and 5.0 NVMe drives draw 5–8 watts under peak load, pushing uncooled controller temperatures past roughly 80°C, where thermal throttling typically kicks in (the exact threshold varies by controller model). If your motherboard lacks a built-in heatsink on the secondary M.2 slot, or if you need to replace a dried or missing thermal pad on your existing cover, these tested cooling options keep your drive running at peak throughput under $15.
Thermalright M.2 2280 Pro / All-Aluminum Heatsink (~$7 – $9)
Best Value Heatsink
A grooved all-aluminum heatsink designed specifically for standard 2280 M.2 SSDs. Includes pre-cut double-sided thermal silicone pads and a rigid multi-screw clamping bracket that ensures even contact pressure across the controller and NAND chips without bowing the PCB. Drops temperatures by 15–25°C under heavy loads.
Key Highlights:
- Double-sided silicone thermal pads included in the box
- Universal 2280 form factor compatibility
- Low profile clears dual-slot GPU overhangs
- Rigid screw clamp avoids plastic clip breakage
be quiet! MC1 / MC1 Pro M.2 SSD Cooler (~$10 – $14)
Best Low-Profile Design
Engineered for tight motherboard layouts directly adjacent to or beneath massive graphics cards. Compatible with both single-sided and double-sided M.2 modules. The Pro variant integrates an embedded copper heatpipe for hot-running high-end PCIe 4.0 and 5.0 drives that demand maximum thermal dissipation.
Best for:
- Slots located directly beneath PCIe graphics cards
- Single-sided and double-sided M.2 2280 SSDs
- Stealth all-black aesthetics
- Integrated copper heatpipe (MC1 Pro version)
Thermal Grizzly Minus Pad 8 (1.0mm) (~$8 – $11)
Top Pick Thermal Pad
The industry benchmark for replacing missing or degraded factory thermal pads on motherboard heatsinks. With 8.0 W/m·K thermal conductivity and high compressibility, it bridges micro-gaps and height differences between the controller and NAND packages without applying excess mechanical stress to the solder joints.
Features:
- 8.0 W/m·K thermal conductivity rating
- 1.0mm thickness (standard for most motherboard heatsinks)
- Electrically non-conductive and non-curing silicone
- Easily trimmed with scissors to exact chip dimensions
Gelid Solutions GP-Ultimate Thermal Pad (1.0mm / 1.5mm) (~$7 – $9)
Max Thermal Conductivity
With an exceptional 15 W/m·K rated conductivity, GP-Ultimate is built for sustained high-throughput workloads like long game downloads, uncompressed texture streaming, and intensive benchmarking. It delivers maximum heat transfer from high-heat SSD controllers (like Phison E18 or InnoGrit) directly to metal covers.
Ideal for:
- 15 W/m·K ultra-high thermal conductivity
- Hot PCIe 4.0/5.0 controllers under sustained load
- Non-conductive and anti-oil bleed formulation
- Outstanding performance per dollar
* As an Amazon Associate I earn from qualifying purchases.
Physical Installation: Fitting the SSD
The physical installation process is the same for all NVMe M.2 SSDs regardless of brand or speed class. The slot is keyed — the SSD physically can only insert in one direction — so there is no risk of installing it backwards.
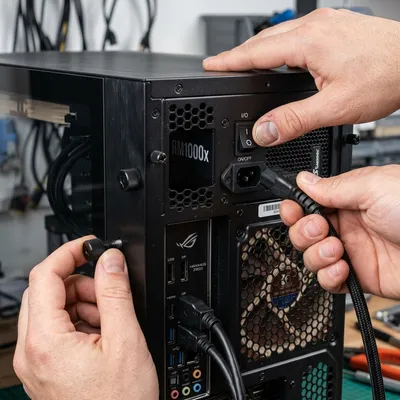
1Power Down and Open Your Case
Shut down Windows completely (not Sleep or Hibernate).
Safety steps before touching components:
1. Flip PSU switch to Off (O) position.
2. Unplug power cable from the wall.
3. Press case power button once to discharge residual capacitor energy.
4. Remove side panel.
5. Touch metal case chassis to discharge static electricity.
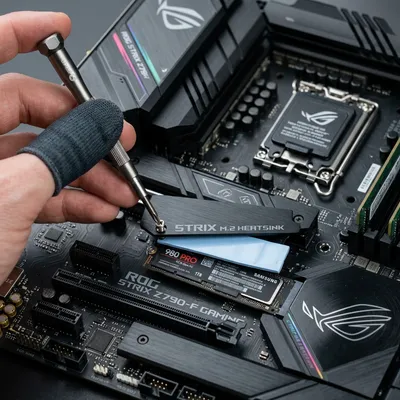
2Remove the M.2 Heatsink (If Present)
If your motherboard has a heatsink cover over the M.2 slot, unscrew its retention screws and lift it off.
Keep pre-applied thermal pads intact on the heatsink contact surface.
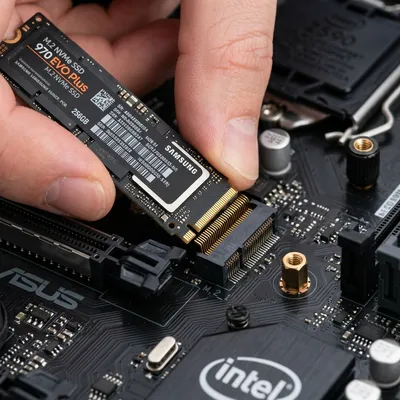
3Insert the NVMe SSD at an Angle
Locate the M.2 slot and insert the drive:
1. Hold the SSD by its PCB edges — do not touch gold contact pins.
2. Insert into the slot at roughly a 30-degree angle.
3. Push firmly until gold contacts are fully seated.
4Secure the SSD with the Retention Screw
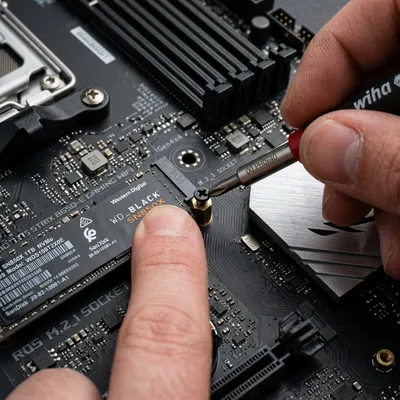
Press the free end of the SSD down flat against the standoff post.
Securing steps:
1. Ensure the drive rests on top of the standoff post (never directly on the PCB).
2. Insert the small M2 retention screw and tighten until snug.
3. If using a thermal pad: peel protective plastic film from both sides before attaching heatsink.
5Reinstall the Heatsink and Close the Case
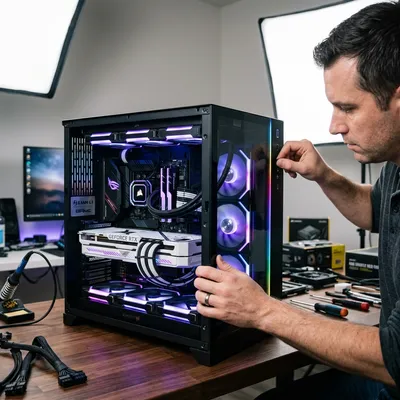
Reinstall the M.2 heatsink cover (tighten screws until snug).
Close case side panel, reconnect power, flip PSU switch to On (I), and boot your PC.
BIOS Detection and Configuration
After physical installation, the next step is confirming the BIOS detects the new drive. In most cases with modern motherboards and drives, this is automatic. The BIOS check is also where you configure PCIe generation and boot order if this is a new boot drive.
1Enter BIOS and Verify Drive Detection
Power on the PC and immediately press Del (ASUS, MSI, Gigabyte, ASRock) or F2 (laptops/OEMs).
Drive verification:
• Navigate to Storage / M.2 Configuration section.
• Confirm your SSD appears listed with model name and capacity.
If the SSD is not detected: reseat the drive, check that the retention screw isn't overtightened, and check motherboard manual for shared SATA/PCIe lane restrictions.2Configure PCIe Generation (Optional for PCIe 4.0/5.0 Drives)
Check M.2 slot configuration in BIOS:
• If PCIe generation shows lower than rated (e.g. Gen3 instead of Gen4), change setting to Gen 4/5 or Auto.
• Save settings and exit.
3Set Boot Priority If This Is a New Boot Drive
If installing as primary OS drive:
• Navigate to BIOS Boot menu.
• Move NVMe drive to top priority in boot order.
• Save settings and exit.
Setting Up Windows on the New Drive
Once BIOS detects your drive, you have two options: initialize it as a data drive (if keeping your existing OS drive), or install/migrate Windows onto it (if replacing the boot drive). Both processes are covered here.
1Initialize as a Data Drive (Second Drive Scenario)
If keeping your existing OS on current drive:
Disk Management setup:
1. Press Win + X → Disk Management.
2. Right-click uninitialized disk → Initialize Disk → select GPT → OK.
3. Right-click unallocated space → New Simple Volume → format as NTFS.
Game library setup:
• Steam: Settings → Downloads → Steam Library Folders → Add Folder
• Epic Games: Settings → Manage → Change default location
2Clone Your Existing OS to the NVMe (Boot Drive Replacement)
To transfer your existing Windows installation:
Cloning steps:
1. Use manufacturer tool (Samsung Magician, WD Dashboard) or Macrium Reflect / DiskGenius.
2. Select source drive and target NVMe → run clone process.
3. After cloning, enter BIOS → set NVMe as top boot priority.
4. Verify drive speed with CrystalDiskMark.
If target NVMe is smaller than source disk, shrink source partitions first in Disk Management (right-click → Shrink Volume) before cloning.3Fresh Windows 11 Installation
For a clean OS installation:
Installation steps:
1. Download Windows 11 Media Creation Tool → create bootable USB (8 GB min).
2. Boot from USB (press F11 / F12 during POST).
3. Select NVMe drive as installation target.
4. Install GPU and chipset drivers after first boot.
4Verify TRIM Is Enabled
Open Administrator Command Prompt (Win + X → Terminal (Admin)) and run:
'fsutil behavior query DisableDeleteNotify'
TRIM status check:
• Result '0': TRIM is Enabled (correct state)
• Result '1': Disabled — run 'fsutil behavior set DisableDeleteNotify 0'
Post-Installation Performance Checks
Benchmark Your New SSD with CrystalDiskMark
Download and run CrystalDiskMark (free, crystalmark.info) to verify your NVMe is performing at its rated speeds. Select your new drive in the dropdown. Run the 1GB test. Compare sequential read (top row) and write (second row) results against the manufacturer's spec sheet. A PCIe 3.0 NVMe should show ~3000–3500 MB/s sequential read; PCIe 4.0 should show ~5000–7000 MB/s; PCIe 5.0 should show ~10000–14000 MB/s. Significantly lower results may indicate the BIOS is running the slot at a lower PCIe generation than expected — check the BIOS PCIe mode setting.
Verify SSD Temperatures Under Load
Use HWiNFO64 (free) to monitor SSD temperature during a benchmark run or during gameplay. NVMe temperatures below 60°C are excellent; 60–70°C is normal under sustained load; above roughly 80°C typically indicates thermal throttling, though the exact point varies by controller. If your drive is throttling: verify the heatsink is properly seated with a full-contact thermal pad, ensure case airflow moves over the M.2 area (add a case fan if necessary), and check that the PCIe mode isn't forcing the drive to work harder than necessary.
Check Game Load Time Improvement
Verify the upgrade worked as expected by loading a map in CS2 or Valorant and comparing load times to before. On a SATA SSD → NVMe upgrade: expect 20–40% faster map loads. On an HDD → NVMe upgrade: expect 70–85% faster map loads (30-second loads dropping to 5–8 seconds). If load times are unchanged, verify the game is installed on the new NVMe drive (not the old drive) and that the BIOS is booting from the NVMe at its correct PCIe generation.
Frequently Asked Questions
No. When adding a second NVMe as a data drive (while keeping your existing OS drive), Windows does not need to be reinstalled. Simply boot normally after installation, initialize the drive in Disk Management, format it as NTFS, and it's immediately ready to use. Only if you are replacing your boot drive do you need to either clone your existing OS or reinstall Windows fresh.
Both use the same M.2 form factor and can look similar, but they use different interfaces and offer dramatically different performance. M.2 SATA connects via the SATA protocol and maxes out at approximately 550 MB/s sequential read — the same as a 2.5-inch SATA SSD, just in a smaller form factor. M.2 NVMe connects via PCIe lanes and offers 3000–14000 MB/s sequential read depending on generation. Most modern M.2 slots are wired for NVMe only. To confirm your drive and slot compatibility, check both the slot specification in your motherboard manual and the drive's key type (M-key NVMe drives have a single notch offset toward one edge; B+M-key SATA drives have two notches).
The most common causes: (1) The drive is not fully seated — power down, remove and reinsert the SSD, ensuring it's pushed in at the correct angle until the contacts are fully engaged. (2) The retention screw is overtightened, bowing the PCB — loosen slightly. (3) The M.2 slot supports only SATA, not NVMe — check your motherboard spec sheet. (4) The slot requires a BIOS setting to be enabled — some boards have M.2 slots disabled by default when other PCIe or SATA ports are in use; check the storage configuration section of the BIOS. (5) The slot and drive use incompatible key types (an NVMe M-key drive won't seat correctly in a SATA-only B-key slot) — verify the key type matches before assuming a defect. Note that a PCIe generation mismatch (e.g., a PCIe 5.0 drive in a PCIe 4.0 slot) is not normally a detection issue — PCIe is backward compatible, so the drive should still be detected and simply run at the slot's slower speed.
For most gaming workloads, a heatsink or thermal pad is recommended but not strictly required on a PCIe 3.0 drive. Budget-tier PCIe 3.0 NVMe SSDs typically stay under 65°C in game load scenarios without any thermal solution. PCIe 4.0 and 5.0 drives under sustained sequential read/write can reach 80°C+ without cooling, triggering thermal throttling that reduces speeds to prevent damage. If your motherboard heatsink has a pre-installed thermal pad (most mid-range and high-end boards do), always use it — it takes 30 seconds and makes a significant temperature difference.
Many laptops include one or two M.2 slots accessible from an access panel on the bottom of the machine. The process is similar to a desktop installation: power down completely, disconnect the battery (if accessible), unscrew the bottom panel, locate the M.2 slot, remove the old drive or insert the new one, and reassemble. Verify your specific laptop model supports NVMe drives and note the required form factor (many laptops use 2242 or 2230 drives rather than the standard desktop 2280). Check iFixit.com for model-specific disassembly guides before attempting this on an unfamiliar laptop.
You May Also Like
- How to Apply Thermal Paste: Fix CPU Throttling & FPS Drops in CS2 & Valorant
- How to Enable XMP & Overclock RAM: Step-by-Step Guide for CS2 & Valorant
- Best Ultra-Budget 240Hz Monitors Under $120 for CS2 & Valorant (2026)
- Best Ultra-Budget 144Hz Monitors Under $80 for CS2 & Valorant (2026)
- How to Overclock Your Monitor from 60 Hz to 75+ Hz Using CRU