Free Upgrade Guide
How to Overclock Your Monitor from 60 Hz to 75+ Hz Using CRU
Most 60 Hz monitors can safely reach 72–80 Hz with zero hardware cost. This step-by-step guide shows how to unlock extra refresh rate using CRU, eliminate frame skipping, and gain a smoother competitive edge in CS2 and Valorant.
- 8 min read
What Is Monitor Overclocking and Is It Safe?
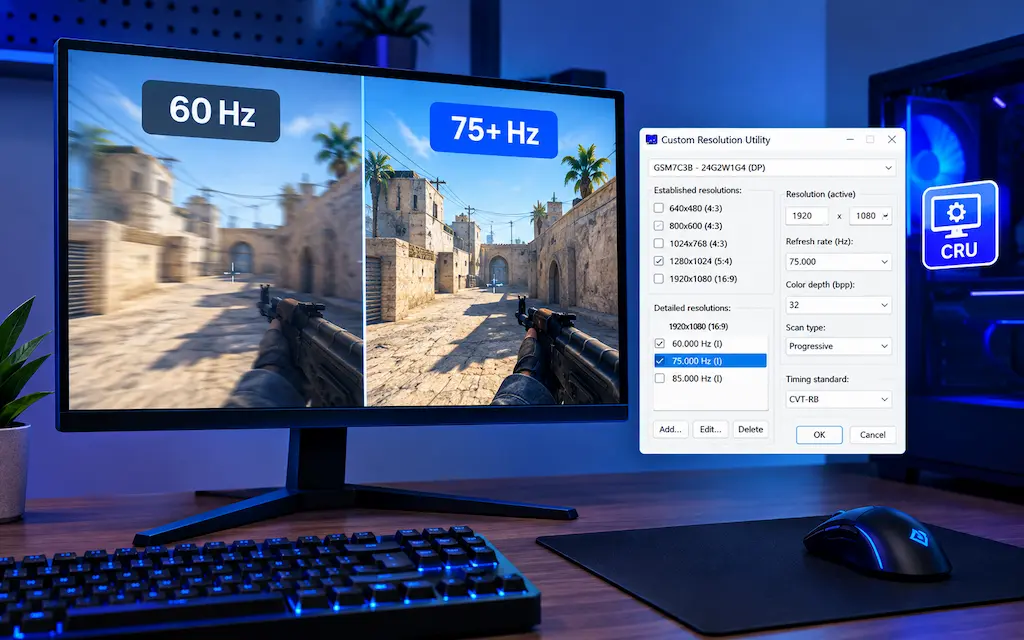
Monitor overclocking means running your display panel at a higher refresh rate than the manufacturer officially rated it for. If you are looking to overclock a 60 Hz monitor to 75 Hz or higher for free, Custom Resolution Utility (CRU) allows you to unlock that extra performance without buying new hardware. When a display is rated at 60 Hz, that rating reflects the refresh rate the manufacturer tested and guaranteed at the time of production — it does not mean the panel physically cannot go faster. The underlying LCD or IPS panel, its timing controller (TCON chip), and the signal interface (typically HDMI or DisplayPort) often have headroom above the rated specification.
The process works by creating a custom modeline — a set of timing parameters that describes to the GPU driver how to send the video signal — and registering it with the operating system's display driver via Custom Resolution Utility (CRU). The GPU then drives the monitor at the new timing; if the display can lock onto the signal, the overclock works.
Is it safe? For the vast majority of users, yes. Monitor overclocking does not void most manufacturers' warranties because it is a software-side operation through the GPU driver — you are not applying more voltage to the panel or modifying any hardware. The monitor cannot be permanently damaged by an unsuccessful overclock attempt: if the panel rejects a custom timing, the display will either go blank or show a corrupted image, and Windows will automatically revert to the previous resolution after 15 seconds if you do not confirm the change. The only realistic risk is slightly accelerated long-term wear on the panel backlight at elevated frequencies, which is negligible at the modest overclock levels (60 → 75 Hz) covered in this guide.
What gains should you expect? Going from 60 Hz to 75 Hz reduces the time between frames from 16.7 ms to 13.3 ms — a 20% reduction in frame interval. In fast-paced games like CS2 and Valorant, this translates to visually smoother motion during peeking, spraying, and tracking moving targets. It is not the same leap as going from 60 Hz to 144 Hz, but it is a real, perceptible improvement — especially if your PC is already pushing 90–120+ FPS and your 60 Hz monitor was the bottleneck limiting how much of that smoothness you could actually see.
What You Need Before Starting
Monitor overclocking with CRU requires no paid software and no hardware changes. You need a Windows PC (Windows 10 or 11), a monitor connected via DisplayPort or HDMI, and an AMD or NVIDIA GPU. A few important limitations to review before starting:
1Check Your Connection Type
DisplayPort connections support custom refresh rates without limitation and are strongly preferred for monitor overclocking. HDMI supports custom refresh rates but is limited by HDMI version and the timing method used: HDMI 1.4 comfortably supports 1080p up to roughly 120 Hz with standard blanking, and can go somewhat higher with a reduced-blanking timing; HDMI 2.0 has considerably more bandwidth headroom. If you are using a VGA or DVI-D connection: VGA (analog) is generally not a reliable path for CRU overclocking on modern LCD panels, and single-link DVI-D is bandwidth-limited to roughly 165 MHz pixel clock, which in practice caps most 1080p overclocks in the 70–75 Hz range rather than allowing an unlimited increase. If your monitor only has VGA in, this guide will not apply well — upgrading to a DisplayPort or HDMI cable is recommended first.
2Understand Which Monitors Respond Best
Monitors built around TN (Twisted Nematic) panels are historically the most overclock-friendly and commonly achieve 72–85 Hz from a 60 Hz base. IPS panels vary significantly by specific panel model — some top out at 70–72 Hz while others reach 80+ Hz. VA panels are generally the least overclock-tolerant and may only accept 65–70 Hz. There is no way to know your panel's exact ceiling without testing, as it depends on the specific TCON chip and panel batch used — two monitors of the same model can behave differently. The testing process in this guide is designed to find your specific monitor's stable limit safely.
3Note: Laptop Displays Are Different
Internal laptop displays (eDP panels) cannot be overclocked through CRU because the panel runs at a fixed internal clock that cannot be altered via software. CRU only works for externally connected displays driven by a discrete or integrated GPU over a standard DisplayPort or HDMI signal. If you are trying to overclock a laptop's built-in screen, this guide does not apply. Overclocking an external monitor connected to a laptop via DisplayPort or HDMI-out works normally.
4Download CRU
Custom Resolution Utility (CRU) is a free (closed-source) utility created by ToastyX. Download the latest version directly from the official CRU thread on the Monitor Tests Forum at monitortests.com (search 'Custom Resolution Utility CRU monitortests' to find the official thread). The download is a ZIP archive containing: CRU.exe (the main utility), restart.exe / restart64.exe (the driver restart tool used to apply changes without rebooting), and reset-all.exe (a safety tool that clears all CRU overrides and restores default display settings if something goes wrong). No installation is required — extract the ZIP to any folder and run CRU.exe. Windows may display a SmartScreen warning on first launch because the file is unsigned; click 'More info' → 'Run anyway'. CRU is safe and widely used in the enthusiast community.
Step-by-Step: Creating a Custom Refresh Rate in CRU
CRU works by editing the Extended Display Identification Data (EDID) — the block of information your monitor sends to the GPU to describe its capabilities. By adding a custom detailed timing to the EDID, you tell the GPU driver that the monitor supports a higher refresh rate, and the driver makes it available as a selectable option in Windows display settings.
1Open CRU and Identify Your Monitor
Run CRU.exe. At the top of the window, a dropdown will list all detected displays. Select your target monitor from the dropdown. The main window shows two sections: 'Detailed resolutions' and 'Standard resolutions'. Detailed resolutions are the primary area where custom refresh rates are added — they define the exact pixel clock and timing parameters sent to the driver. The 'Standard resolutions' section is for adding standard VESA-defined resolutions; it is not used for overclocking.
2Add a New Detailed Timing
In the 'Detailed resolutions' section, click 'Add'. The 'Add detailed resolution' dialog will open. In the 'Refresh rate' field, enter your target frequency — start conservatively with 68 Hz for your first attempt. Do not jump straight to 75 Hz on the first pass; the incremental approach lets you identify your panel's ceiling without risking a signal the monitor cannot handle at all. Leave all other fields (active pixels, blanking, polarity) at their default values — CRU auto-fills timing parameters based on the current active resolution and the refresh rate you enter. The default timing method 'Automatic - LCD standard' is appropriate for monitor overclocking. Click OK to add the timing. You will see the new detailed resolution listed (e.g., '1920 x 1080 @ 68 Hz').
Do not change the active pixel resolution (e.g., from 1920×1080 to something else) unless you intend to add a custom resolution. Only the refresh rate field needs to change for an overclock.3Add Further Target Timings (Recommended)
For efficiency, add multiple timings in one session: repeat the Add process and create entries for 70 Hz, 72 Hz, 75 Hz, and optionally 77 Hz and 80 Hz at your native resolution. Having all of them pre-loaded means you can test each one in sequence from Windows Display Settings without reopening CRU. List them in order from lowest to highest in the Detailed resolutions list.
4Click OK to Save and Restart the Driver
Click OK in the main CRU window to save the modified EDID. Then, without rebooting, run restart64.exe (included in the CRU folder). This tool safely restarts the GPU display driver in seconds — your screen will go black briefly, then return. This applies the new EDID to the driver without requiring a full system reboot. If your screen does not return after 15 seconds, press Ctrl+Alt+Del to access recovery options, or perform a normal reboot — CRU changes are non-destructive and can always be undone with reset-all.exe.
5Select the New Refresh Rate in Windows Display Settings
Right-click the desktop → Display settings (Windows 11) or Display settings → Advanced display settings (Windows 10).
Follow these steps:
1. Find the 'Refresh rate' dropdown.
2. Select the lowest new rate first (e.g., '68 Hz').
3. Click 'Keep changes' when the confirmation dialog appears.
If the screen goes black, Windows automatically reverts after 15 seconds.
On NVIDIA GPUs: custom refresh rates added through CRU appear in Windows Display Settings but may not appear in the NVIDIA Control Panel's 'Change resolution' section. This is normal — using the Windows Display Settings dropdown to select CRU-added rates is the correct approach on NVIDIA.
Critical: How to Test for Frame Skipping
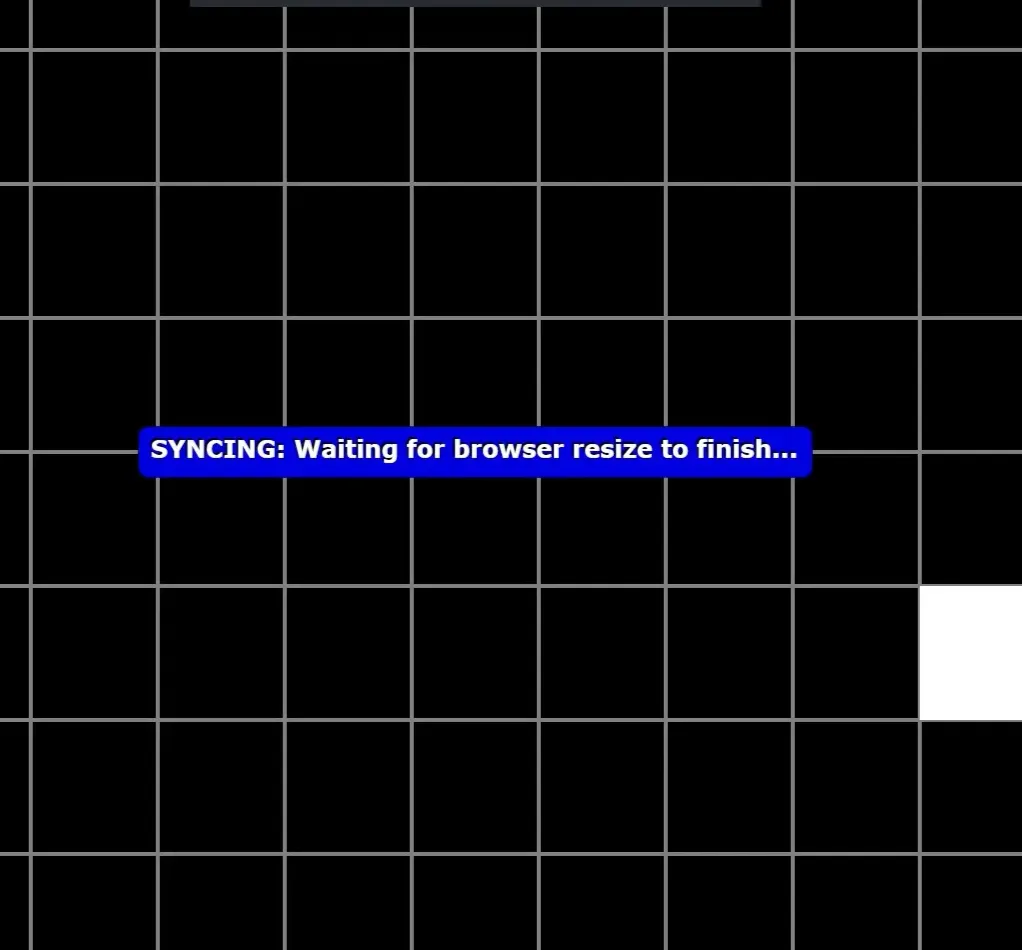
Frame skipping is the most important thing to check after a monitor overclock. A monitor that appears to run at 75 Hz but is actually skipping every second frame is effectively displaying at 37.5 Hz — worse than the original 60 Hz. Frame skipping happens when the monitor's scaler or TCON cannot process frames at the requested rate and silently drops alternating frames while the GPU and OS believe everything is working correctly. Without a frame skip test, you have no way of knowing whether your overclock is actually working.
How to test for frame skipping:
The most reliable free tool is the UFO Test on testufo.com (open it in your browser — no installation needed). Select the frame skipping test from the navigation. The test displays a row of moving UFOs at different multiplied refresh rates. At a correctly running 75 Hz overclock, all UFOs should move at the same apparent speed. If every other UFO appears to stutter or lag behind, frames are being skipped at that rate.
Alternative test with RTSS (RivaTuner Statistics Server): Open RTSS, enable the frametime graph overlay, and navigate to a static desktop or static image in full screen. The frametime should show a flat line near 13.3 ms (for 75 Hz) or the equivalent for your target rate. A frametime graph that alternates between ~8 ms and ~26 ms confirms frame skipping.
If frame skipping is detected: go back to Display Settings and drop to the next lower rate you added (e.g., from 75 Hz back to 72 Hz). Re-test at each rate until you find the highest one where the UFO test passes cleanly. That is your panel's stable overclock ceiling.
NVIDIA vs AMD: GPU-Specific Notes
While CRU works the same way on both AMD and NVIDIA systems, there are a few platform-specific behaviors to be aware of when applying and verifying the overclock.
1NVIDIA GPUs
On NVIDIA systems, custom refresh rates added via CRU appear in Windows Display Settings (right-click desktop → Display settings → Advanced display settings → Refresh rate dropdown) but do NOT appear in the NVIDIA Control Panel's 'Change resolution' section. This is expected behavior — NVIDIA's Control Panel only shows resolutions and refresh rates defined in the monitor's standard EDID, not CRU custom additions. Always use Windows Display Settings to activate CRU-added rates on NVIDIA. Additionally, if you use G-Sync: overclocked refresh rates are typically not G-Sync compatible because G-Sync requires the monitor to be G-Sync certified or G-Sync Compatible validated at that frequency. You can still use the overclocked fixed rate without G-Sync, or you can test whether G-Sync works at your new rate by checking the G-Sync indicator overlay.
2AMD GPUs (and AMD APUs)
On AMD systems, custom refresh rates added via CRU can appear in both Windows Display Settings and in AMD Software: Adrenalin Edition under Display → Custom Resolutions. However, AMD also has a built-in 'Custom Resolution' tool directly in AMD Software — you can use either CRU or AMD's built-in tool for the same purpose. AMD's built-in tool is slightly simpler: open AMD Software → Display tab → scroll down to 'Custom Resolutions' → click '+' → enter your target refresh rate (e.g., 75) at your native resolution → Create. The downside of AMD's built-in tool compared to CRU is that it does not give you the detailed timing control that CRU offers, which can be relevant if a specific timing method reduces frame skipping at a given rate. If AMD's built-in tool fails to produce a stable overclock, try CRU with the 'Automatic - CVT reduced blanking' timing method instead of 'LCD standard'.
3Intel Integrated Graphics
Intel integrated graphics (Intel UHD, Iris Xe) support CRU-based monitor overclocking but with more restrictions. Intel's driver enforces stricter pixel clock limits, and overclocking beyond 65–68 Hz on many panels with Intel iGPU is not possible even if the panel itself could go higher on a discrete GPU. If you have both an Intel iGPU and an NVIDIA or AMD discrete GPU in your system, ensure your monitor is physically connected to the discrete GPU's port (on the back of your dedicated graphics card, not the motherboard's rear I/O panel) — this ensures the discrete GPU drives the display.
Verifying Stability and Using the Overclock in CS2 and Valorant
After confirming no frame skipping at your target refresh rate, run the following verification checks before using the overclock in competitive play:
1Monitor the Display for Artifacts and Flickering
At your overclocked refresh rate, use the monitor for 15–20 minutes on a static Windows desktop and in a game environment. Look for: pixel flickering (random pixels briefly lighting incorrectly), subtle color banding artifacts, image tearing at screen edges (distinct from VSync-off tearing which is GPU-side), or intermittent signal dropouts (brief black screen). Any of these indicate the current rate is at or beyond the panel's limit. Drop to the next lower rate and repeat the check. A stable overclock shows none of these artifacts.
2Set CS2 to Run at the Overclocked Refresh Rate
To use your overclock in CS2:
1. Set the overclock active in Windows Display Settings first.
2. Launch CS2 → Options → Video Settings → Refresh Rate → select your overclocked rate (e.g., '75').
3. Ensure Display Mode is set to Fullscreen.
If the rate doesn't appear, restart CS2 after confirming Windows display settings.
In CS2's Video Settings, the 'Refresh Rate' dropdown only shows values up to the rate currently active in Windows Display Settings. If you set Windows to 75 Hz and then open CS2, you will see 75 as an available option.3Set Valorant to Run at the Overclocked Refresh Rate
To use your overclock in Valorant:
1. Set the overclock active in Windows Display Settings first.
2. Launch Valorant → Settings → Video → General → Display Mode → set to 'Fullscreen'.
3. Set Limit FPS to 'Off' or above your refresh rate.
Valorant uses the active Windows system refresh rate automatically in Fullscreen mode. Verify with the in-game Hz counter under Stats to Show.
4Match Your FPS Cap to the New Refresh Rate
With a 75 Hz overclock, consider capping your in-game FPS to 75 or a small multiple (150, 225) to reduce GPU heat and maintain consistent frametime. In CS2, set your FPS cap via the console: 'fps_max 300' is common for high-FPS scenarios, but 'fps_max 225' (a 3x multiple of 75) can reduce frametime variance. In Valorant, use Settings → Video → Limit FPS in Game. Running uncapped FPS with a 75 Hz display still benefits from the higher refresh — the display will pick the closest available frame — but a capped approach produces more consistent frametimes and reduced stutters on lower-end PCs.
Troubleshooting: Common Problems and Fixes
New refresh rate options do not appear in Windows Display Settings
This usually means the driver restart via restart64.exe did not apply correctly. Solution: perform a full system reboot after saving CRU changes, then check Display Settings again. If rates still do not appear, open CRU again and verify the custom detailed timings were saved (they should be listed under 'Detailed resolutions' for your monitor). Ensure you are looking in the right place: on Windows 11, go to Settings → System → Display → Advanced display → Refresh rate dropdown. On Windows 10, right-click desktop → Display settings → Advanced display settings → Refresh rate. On NVIDIA systems, do not look in NVIDIA Control Panel — CRU-added rates only appear in the Windows Display Settings dropdown, not in NVIDIA Control Panel's resolution list.
Screen goes black and does not recover after selecting a rate
This is expected behavior when the panel cannot accept the signal. Windows automatically reverts to the previous safe rate after 15 seconds if you do not click 'Keep changes'. If Windows does not revert (rare): press Ctrl+Alt+Del and wait for the lock screen to appear (which forces a display reset), or boot into Safe Mode and run reset-all.exe from the CRU folder to clear all overrides, then reboot normally. The display is not damaged. After recovery, try the next lower rate. If even 65 Hz causes a black screen, the panel likely has limited overclocking headroom — try 62 Hz or 63 Hz as a starting point.
Frame skipping detected at 75 Hz but not at 72 Hz
This is normal — 72 Hz is your panel's stable ceiling for this specific monitor and connection. Use 72 Hz as your active overclock. The difference between 72 and 75 Hz is approximately 0.4 ms per frame — perceptually identical. 72 Hz is a meaningful improvement over 60 Hz: the frame interval drops from 16.7 ms to 13.9 ms, which is still a noticeable smoothness improvement in CS2 and Valorant.
Overclock works in Windows but CS2 or Valorant runs at 60 Hz
This almost always means the game was launched before the overclocked rate was set as active in Windows Display Settings, or the game is not running in true fullscreen mode. Fix: exit the game fully → right-click desktop → Display settings → set refresh rate to your overclocked value (e.g., 75 Hz) → Apply → launch the game → set fullscreen mode in-game video settings → verify the game's FPS counter or rate display shows the overclocked rate. For CS2: check Options → Video → Refresh Rate (or enable cl_showfps 1 to monitor in-game framerate). For Valorant: check the in-game stats overlay for the active Hz counter.
How to revert to 60 Hz if the overclock causes instability
Open Windows Display Settings and select '60 Hz' from the refresh rate dropdown — no reboot required. Then open CRU, select your monitor, and delete the custom detailed timings you added by selecting them and clicking 'Delete'. Run restart64.exe to apply — or, for a full clean reset, run reset-all.exe from the CRU folder, which clears every override at once. This fully removes the overclock and restores the default 60 Hz EDID. The process is completely reversible at any stage.
Frequently Asked Questions
In the vast majority of cases, no. Monitor overclocking is a software operation through the GPU driver — CRU modifies the EDID data the GPU presents, but does not flash the monitor's firmware or modify the physical hardware. Most monitor warranties do not cover software-side configuration changes. However, warranty policies vary by manufacturer and region. If your monitor develops a hardware defect and you are within the warranty period, it is advisable to revert to the default 60 Hz EDID via CRU (using reset-all.exe) before contacting support, as the support agent cannot tell whether an overclock was ever applied if the EDID is restored to stock.
Both achieve the same result — adding a custom refresh rate to the display driver's EDID. AMD's built-in tool is simpler to use and sufficient for most users. CRU provides more control over timing parameters (pixel clock, blanking intervals, sync polarities) and works on both AMD and NVIDIA systems. If AMD's built-in tool produces frame skipping at a rate where CRU does not, the difference is the timing method: CRU's 'CVT reduced blanking' timing uses a lower pixel clock for the same frame rate, which can reduce the load on the HDMI or DisplayPort signal path and resolve borderline cases.
Several causes are possible. First, confirm there is no frame skipping using the UFO test at testufo.com — a frame-skipping overclock feels worse than 60 Hz. Second, check that the game is running in true fullscreen mode, not borderless windowed (borderless windowed bypasses the display's fixed refresh rate and uses the Desktop Window Manager, which adds latency). Third, check that your in-game FPS is consistently above 75 — if your PC dips to 50–60 FPS in-game, the 75 Hz display rate does not help because the game is not generating enough frames. Fourth, check VSync status: with VSync on at 75 Hz, FPS will be locked to exactly 75 — if your GPU cannot maintain that, VSync will drop to 37.5 Hz (half rate), causing very noticeable judder. Disable VSync and use an FPS cap instead.
Native 75 Hz monitors — panels built and binned for 75 Hz operation — generally have less overhead above their rated frequency than 60 Hz panels do, because 75 Hz panels are already running closer to their TCON's design limit. Some 75 Hz TN panels can reach 80–85 Hz, but gains above 85 Hz on a 75 Hz-rated panel are rare and typically accompanied by frame skipping or visible artifacts. The diminishing returns get steep: going from 75 Hz to 85 Hz is a smaller perceptual improvement than the original 60→75 Hz jump. If 100+ Hz is your target refresh rate, a native 144 Hz panel is the reliable path.
Yes, in a positive way. Higher refresh rates reduce display lag independent of GPU rendering. At 60 Hz, each frame is displayed for 16.7 ms — even if the GPU renders a frame in 5 ms, it waits up to 16.7 ms before the display shows it. At 75 Hz, that maximum display wait drops to 13.3 ms. The result is reduced end-to-end input lag (the time from a mouse click to the on-screen response) by approximately 3–4 ms compared to 60 Hz — with zero hardware cost when using CRU. This reduction is real and measurable with a high-speed camera, and it is meaningful for CS2 duels and Valorant 1v1 scenarios where reaction times matter.
There is no universal answer — it depends entirely on the specific panel model and TCON chip in your monitor. TN panels at 1080p most commonly top out at 75–85 Hz with no frame skipping. IPS panels at 1080p typically achieve 70–75 Hz. VA panels often achieve 65–70 Hz. A small number of TN panels can reach 90–100 Hz, but this is uncommon and usually comes with visible pixel inversion artifacts or intermittent frame skipping. The only way to know your specific ceiling is to test incrementally using the method described in this guide and verify with the UFO frame skip test at each step.
You May Also Like
- How to Lube Mechanical Keyboard Switches: From Scratchy to Smooth on a Budget
- The Coin/Battery Mod for Wireless Mice: Perfecting Balance for CS2 & Valorant
- How to Enable XMP & Overclock RAM: Step-by-Step Guide for CS2 & Valorant
- How to Reduce Input Lag in CS2 & Valorant: Complete Guide
- Best Ultra-Budget 240Hz Monitors Under $120 for CS2 & Valorant (2026)